How to iron a long sleeve shirt
The washerwoman ran away with the gardener and you were left without ironed shirts? Do not despair. We will teach you how to deal with this issue on your own. Clear instructions will help you become a pro at ironing shirts for a flawless look.
Types of shirts with sleeves

A brief overview of the variety of shirts with long sleeves will help us understand the features of the products and the need for ironing them.
There are 2 main types of products: classic shirts and sports models. These options are found in men’s, women’s and children’s clothing.
The table shows the distinctive features of classic and sports models:
|
|
|
|
Classic shirt
|
natural fabric is used for tailoring: poplin, twill, oxford, etc.;
colors: white, black, light shades of blue, yellow, pink;
the presence of a small pattern, stripes, cells is allowed;
the collar is rigid;
the bottom of the product is rounded;
pockets are either absent, or there is one pocket;
combined with classic trousers or a suit;
suitable for formal ceremonies and as office wear.
|
|
Sports shirt
|
Synthetic and natural fabrics of different colors and textures are used for manufacturing: jeans, flannel, oxford.
the presence of decor in the form of epaulettes, pockets with valves, fasteners, zippers is allowed;
combined with jeans and trousers;
used for office, informal occasions, daily wear.
|
Any clothing, classic or sporty, looks attractive if it is clean and well-groomed. And this does not mean at all that all clothes are subject to mandatory ironing.
Modern technologies make it possible to produce wrinkle-resistant fabrics. Products made from such textiles are popular due to the exclusion of such a procedure as ironing. If you want to purchase models from wrinkle-resistant fabrics, look for the following inscriptions on the product label:
-
wash and go;
-
wash and wear;
-
non-iron;
-
easycare.
Sports and casual models sometimes do not need ironing. This is determined by the type of fabric. Often, it is enough to shake well, straighten the clothes after washing and, if necessary, iron some details.
Types of fabrics and the need for ironing

You have probably noticed that some shirts practically do not wrinkle during the whole working day and require minimal ironing time. And some specimens are covered with a grid of folds from the breath of a light breeze.
If you want to save yourself from the tedious procedure of ironing shirts, pay attention to attention to the rating of fabrics by the degree of wrinkling. Characteristics are presented in the table.
|
|
|
|
|
Twill
|
Spectacular textile with diagonal stripes. Does not shed, well tolerates frequent washing. Suitable for everyday use
|
Virtually no wrinkling
|
|
Jacquard
|
Luxurious fabric with an embossed pattern. Practical and durable
|
Virtually no wrinkling
|
|
satin
|
Lightweight, pleasant to the touch hypoallergenic fabric. Endowed with good hygroscopic properties and has a noble luster
|
Virtually no wrinkling
|
|
Oxford
|
Practical fabric, does not require special care. Suitable for daily wear and frequent washing
|
Average degree
|
|
Poplin
|
Textile is smooth and dense
|
Average degree
|
|
Pinpoint
|
Thin soft fabric on a natural basis. Comfortable for daily wear
|
Wrinkles very much
|
As you can see, the manufacturers of men’s shirts have made sure that everyday clothes do not bring us much trouble. Most shirting textiles are resistant to daily stress, withstand frequent washing and ironing.
How to iron a shirt
The ironing process itself, with good skill and a high-quality iron, takes no more than 5 minutes. It will take even less time to process things with a steam generator. Let’s get started.
Ironing a men’s shirt with long sleeves
If the shirt is freshly washed, do not let it dry. A little residual moisture will help to iron the shirt perfectly. In the event that the thing is completely dry, you need to do the following:
-
Straighten the product and moisten it with water from a spray bottle.
-
Place the shirt in a clean plastic bag.
-
Leave the item to moisten evenly for 5 minutes.
-
Take out the shirt and start ironing.
This method does not apply to silk and viscose products, since stains form on their surface from moisture. For moisturizing, it is better to wrap such a shirt in a slightly damp towel.
Iron setting
We turn on the iron and set the temperature indicated on the information label of the product. The use of steam is not necessary as we pre-moistened the fabric.
If for some reason the label on the clothes is missing, you can use our memo:
|
|
|
|
|
Linen
|
210-230
|
Yes
|
|
Cotton
|
120-150
|
Yes
|
|
Denim
|
150
|
Yes
|
|
Viscose
|
120
|
No
|
|
Polyester
|
up to 110
|
No
|
|
Silk
|
up to 80
|
No
|
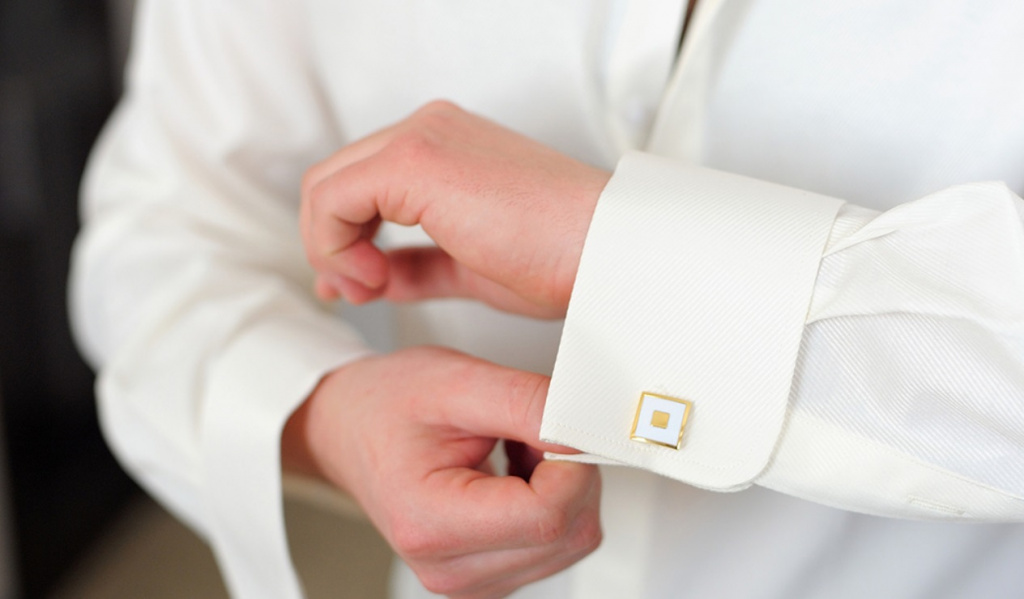
cuffs
First of all, iron the cuffs. Do this only from the wrong side if you are afraid of getting shiny stripes from the iron. We iron in the following order:
-
First, we straighten the cuffs, put them with the wrong side up and draw the iron from the outer edge to the stitching seam. This is necessary so that all the folds go up, and not to the bottom stitching of the cuffs. Smooth out the fabric around the button.
-
Turn the cuffs over and iron from the front side.
-
Next, we process the bar for the fastener. We do this from the inside out, ironing the edges well. You can also do this from the front.
Sleeve
Many people have a question whether to iron a sleeve with or without an upper arrow. This is definitely a matter of taste and style of clothing. Classical clothing does not reject the wearing of shirts with an arrow on the sleeves. But casual style and sports models do not imply the severity of the silhouette. Therefore, smoothing the fold is not worth it.
To iron the sleeves, you need to do the following:
-
Straighten the sleeve so that the seam is on the fold.
-
Iron the seam, pulling it a little. Holding the edge of the seam with your hand, move the iron, slightly stretching the fabric. Make sure that there are no ironed small folds.
-
Pass the iron on both sides of the sleeve panel, while not ironing the top edge. If you accidentally hit the top, moisten this place, move the smoothed arrow to one of the sides and gently smooth this place.
Yoke and shoulder
We lay out the fabric so that the shoulder seam of the sleeve is on the rounded edge of the ironing board. Let’s do the following sequence:
-
Straighten the yoke and iron the seams. They should not wrinkle and have smoothed folds.
-
Let’s straighten the fabric of the part directly.
-
Slightly shift the shoulder seam to the surface of the board and carefully process only its upper part.
Shelves and back
Now you need to straighten the shirt so that one of the shelves lies completely on the surface of the board. Let’s start ironing:
-
If you started on the left front, work on the zipper bar first. Iron it from the front (or back) side, slightly stretching the fabric.
-
Smooth out the shelf. Don’t forget the bottom hem.
-
Go to the side seam, smooth it carefully.
-
Iron the back fabric. Smooth out the darts, if any. Darts are seams that slightly fit the silhouette of the shirt.
-
If there are folds in the place where the yoke is attached, carefully smooth them out without leaving any creases.
-
Go to the next side seam and the right button front.
-
Treat the shelf in the same way as the left one. When ironing the placket, be careful not to touch the buttons with the iron. They can melt from heat.
Collar
The most prominent detail of the shirt should look flawless. To do this, we will iron in 3 stages:
-
Lay the collar down on the ironing board with the wrong side up.
-
Carefully iron all edges.
-
Lay the shirt down so that the bottom seam of the collar pole lines up with the edge of the ironing board.
-
Let’s iron this detail without affecting the neighboring areas.
-
Fold the collar the way it looks when worn, and fix this fold with an iron from the side of the stand.
How to iron women’s and children’s shirts
The process of ironing a women’s long-sleeve shirt has no fundamental differences from ironing men’s models. The only difference is the presence of small parts and darts. Therefore, the sequence of actions will differ in that at the first stage we will iron ruffles, frills, pocket flaps. Next, we follow the general scheme for processing the shirt:
-
cuffs;
-
sleeves;
-
coquette (if any);
-
shoulder seam;
-
shelves and back;
-
collar.
In the same sequence, we iron children’s models.
How to straighten a shirt without an iron
If you’re on the road, don’t have an iron, or just don’t have the time, alternative fabric ironing methods may come in handy. These methods are applicable to classic and sports models.
Method 1
It’s great if you have the whole night and a balcony in stock. Do this. Put on a wrinkled shirt on a coat hanger and hang it on the balcony. Night humidity, clean frosty or summer air will smooth out wrinkles and fill the fabric with freshness.
Method 2
If you are always in a hurry, keep a can of water with a spray bottle handy. This is a universal thing to come in handy for urgent resuscitation of a shirt.
If you have 5 minutes, hang the shirt on a coat hanger or back of a chair and spray it with a can of water. Do not bring the sprayer too close to avoid leaving wet spots on the fabric. Clothing should be moistened evenly. With clean palms, smooth out the creases and lightly pull the fabric in different directions.
When every second counts, the shirt is already on you, and you need to look decent, do the same without taking off your clothes. The heat released from the body will act as an iron and the clothes will straighten out even faster.
Method 3
If in the morning you are in a hurry and there is no time left for ironing, feel free to go to the shower and do not forget to take your shirt with you. Put it on a coat hanger and hang it where the most steam from hot water accumulates. But avoid direct splashing. While you are taking water treatments, warm, moist air will do its job. You will leave the shower with your shirt already ironed.
General recommendations
Theoretically, and perhaps already practically, you know how to iron a shirt. Finally, we will offer you a list of small tricks that will certainly come in handy:
-
Often, ironing begins with the collar and at the end of the procedure, it is ironed again to make sure it looks perfect. The collar is the part that already wears out faster than the rest of the parts, and double hot working will make the threads even weaker. So why not complete the whole process with a neat ironing of the collar.
-
The habit of moistening things before ironing can surprise in the form of unpleasant stains and streaks on silk, satin, viscose fabrics.
-
If in doubt whether to iron a thing from the front side or not, adhere to the following rule: iron colored and dark clothes only from the inside out, and white clothes from 2 sides.
-
To keep your shirt looking fresh longer, use a starch spray. You can buy the product at a hardware store or make your own. To do this, mix 1 tbsp. l. starch with 2 tbsp. water. Moisten clothes with this spray while ironing.
Now you don’t need a maid or a laundry. Take advantage of our recommendations for ironing long sleeve shirts and turn a routine task into a favorite thing for you.


Добавить комментарий
Для отправки комментария вам необходимо авторизоваться.